


I have had a lot of people request instruction on
how to use a ruffler foot on their sewing machine.
So, I am happily obliging that request
by providing a tutorial.
First of all... if you don't have a ruffler foot...
you need one! They're amazing in every way!
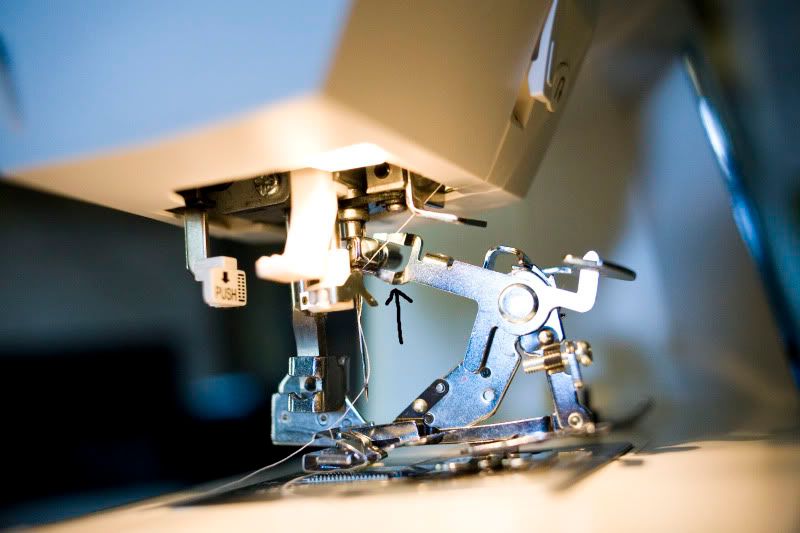
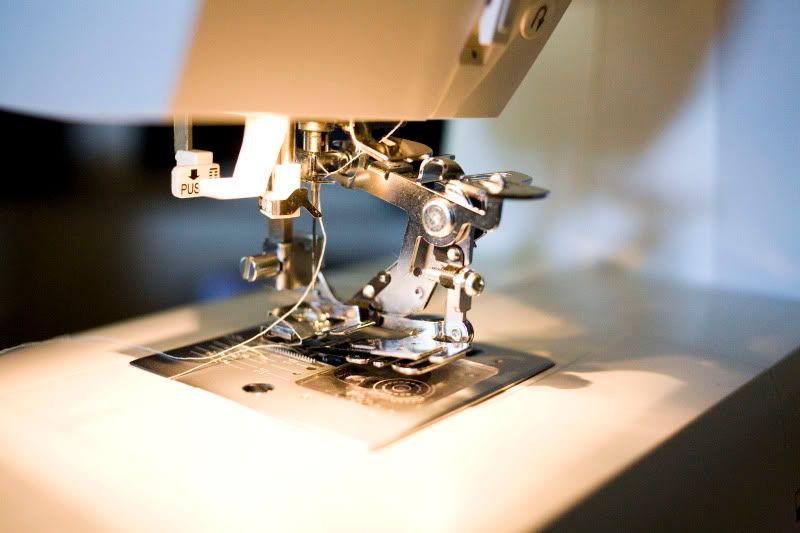
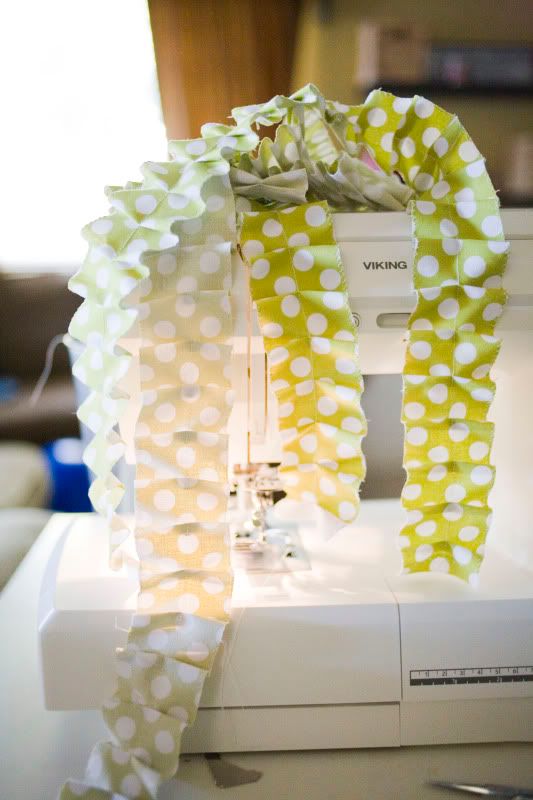
Have your sewing machine ready?
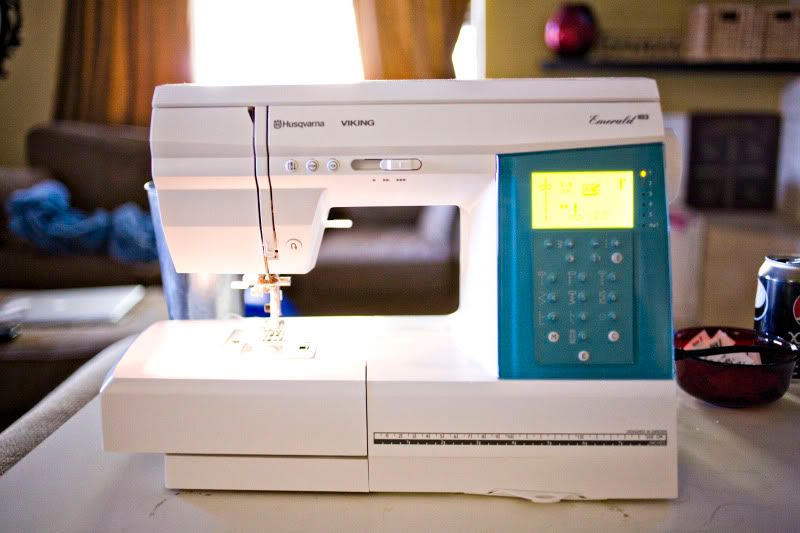
Yes, the above is my new sewing machine. :)
OK, here we go...
First thing you need to do is remove the boot & the foot
on your sewing machine... like so:

Say hello to the ruffler foot...
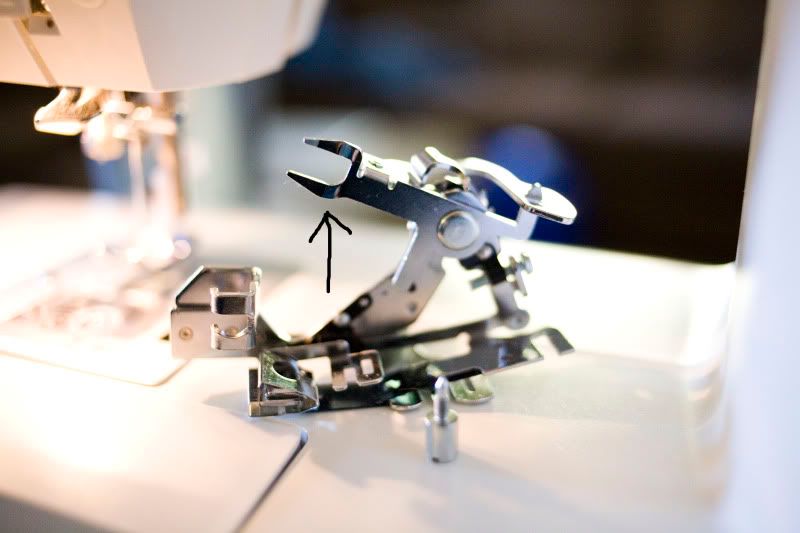
I assure you it's saying hello back. :)
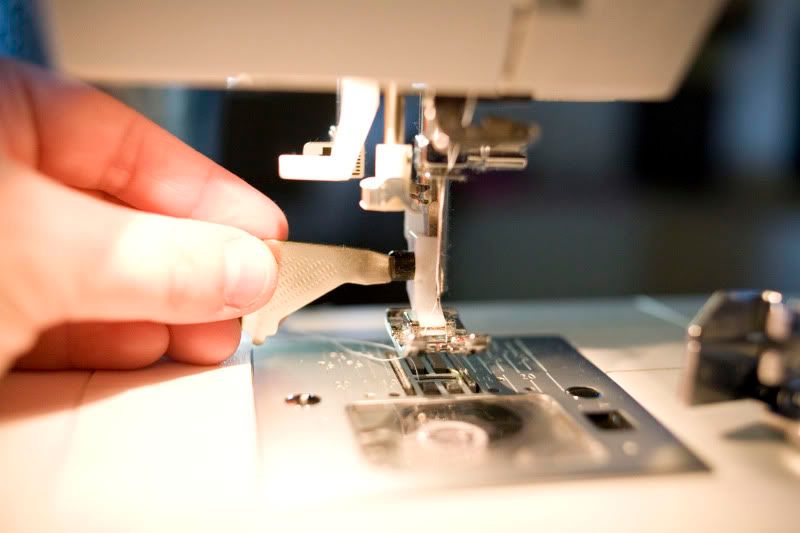
OK. See this screw below? The screw that essentially
holds the needle in place?
Good. Now see this part of the ruffler foot...
it looks like a wrench ...
OK. The wrench looking piece needs to
go onto the screw that holds the needle.
Basically, it looks like that wrench piece is grabbing the screw.
Like so:
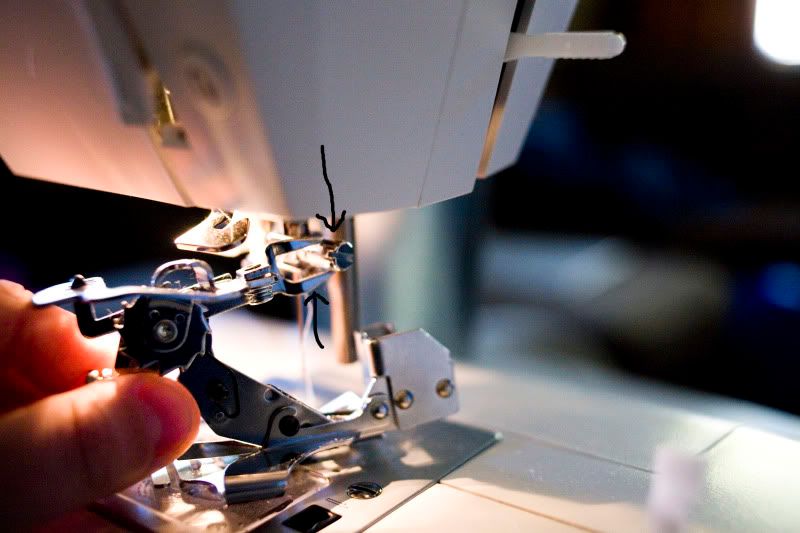
OK. Now, once that wrench looking piece
is "grabbing hold" of the screw that holds the needle
{I have no idea what it's called... can you tell}
then the ruffle foot will have no choice but to
end up wrapped around where the boot would normally go.
If that makes no sense, email me.
I couldn't get a good picture.
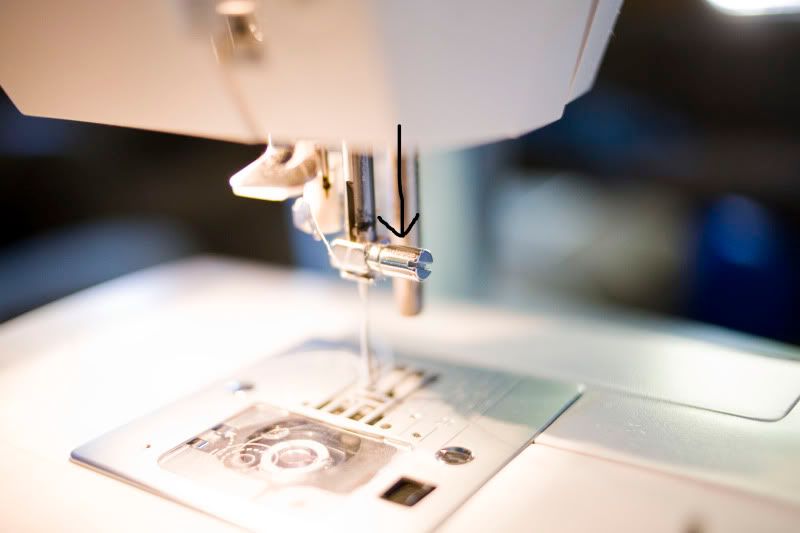
Anyway... the ruffler foot comes with a long screw
like this one:
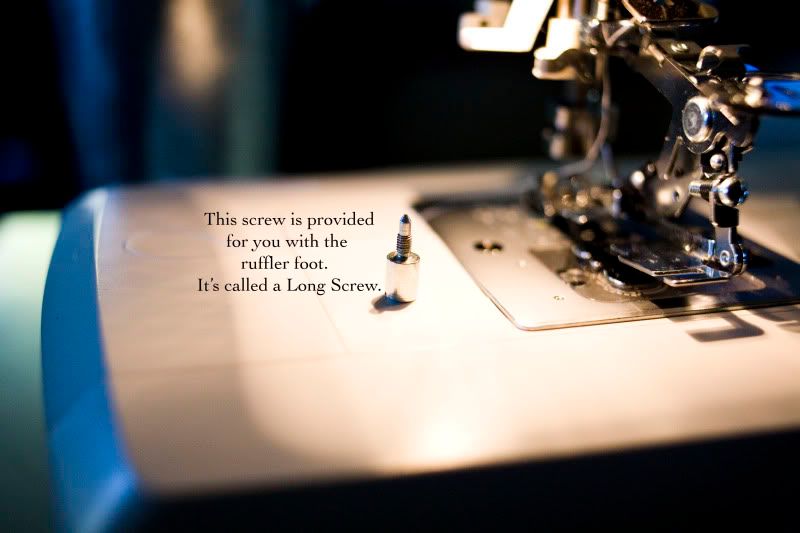
Tighten the screw. Make sure that ruffler foot is on their
nice and snug. But don't over tighten, or you
could accidentally strip the screw.
It will look like this:
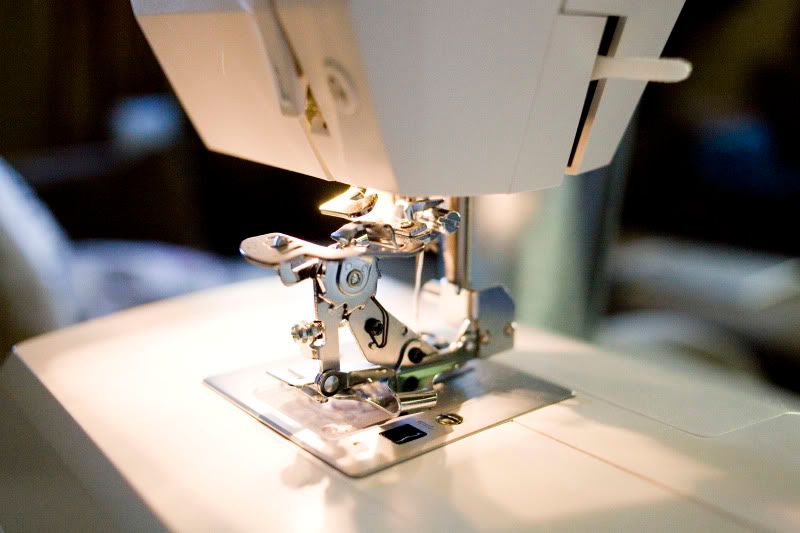
We are almost ready to make ruffles!
But not quite yet.
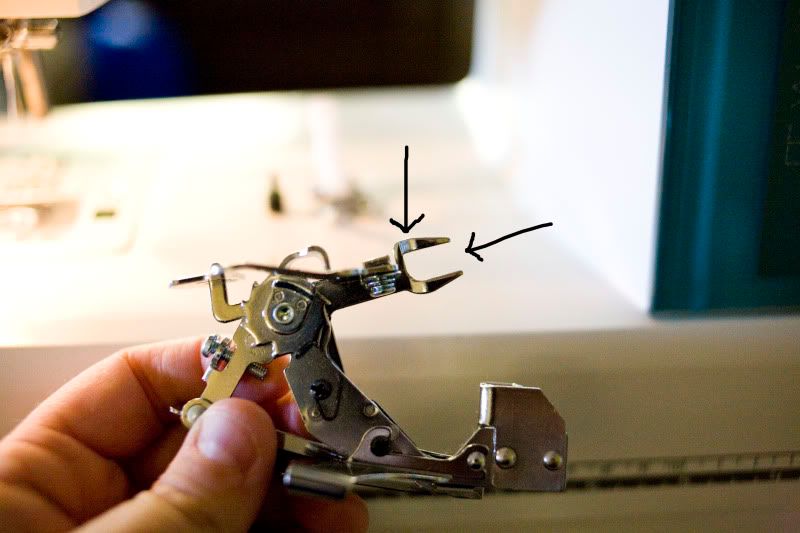
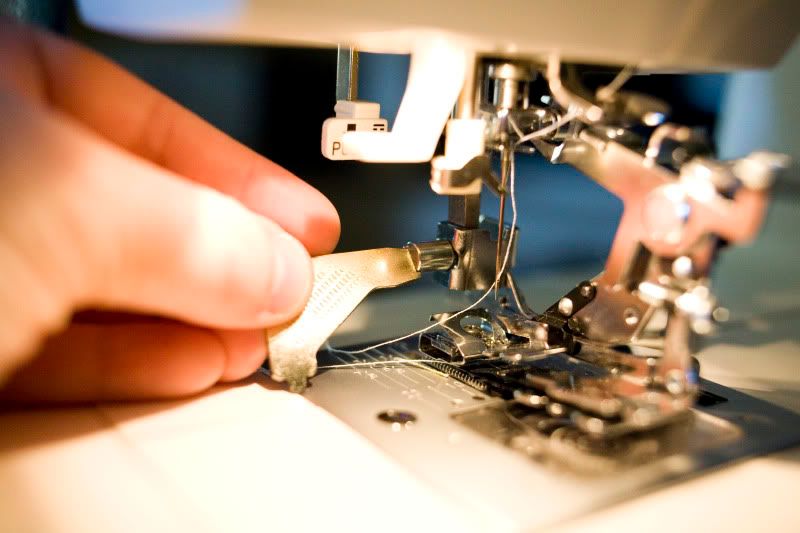
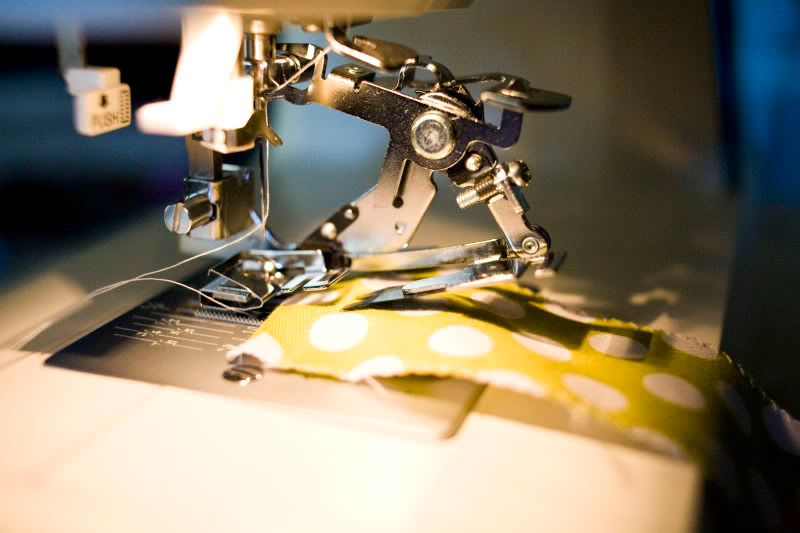
See this?
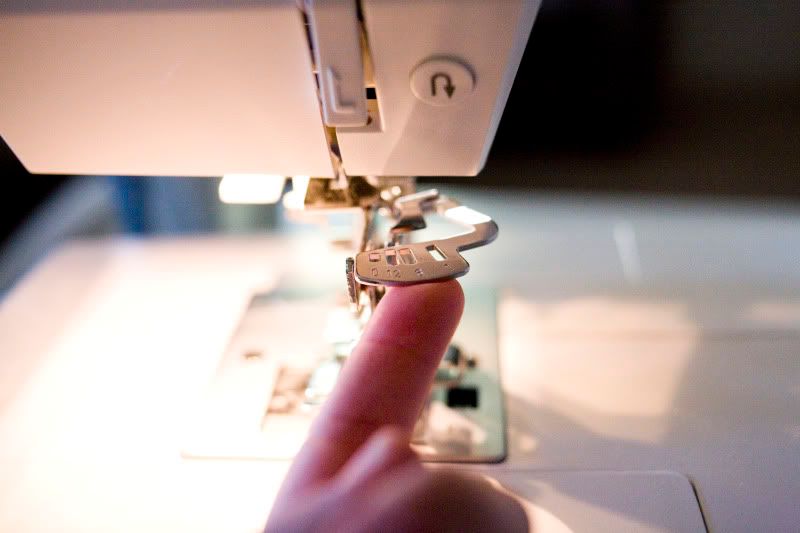
This "tells" the foot how often to make a ruffle.
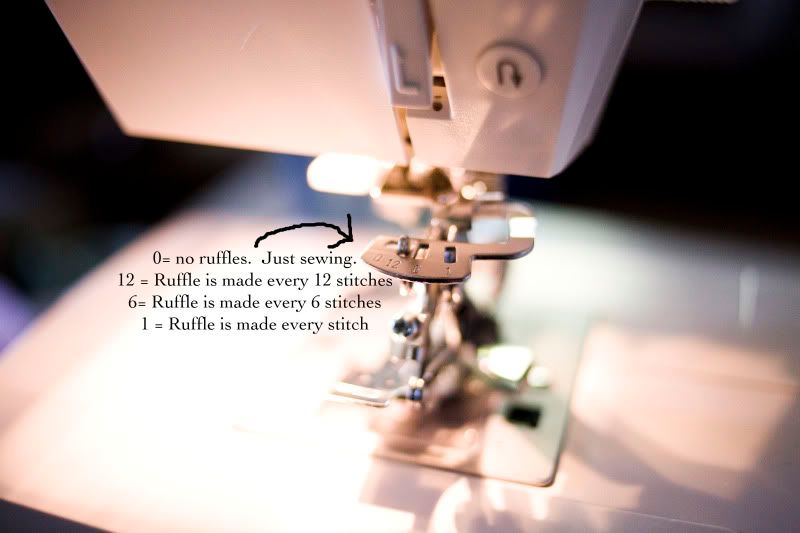
Now you need to decide how much you want
your fabric ruffled.
Once you decide that, you're ready to sew! :)
There is a little slot in this foot.
That is where you put your fabric in.
If you don't, it will only sew. There will be no ruffle making.
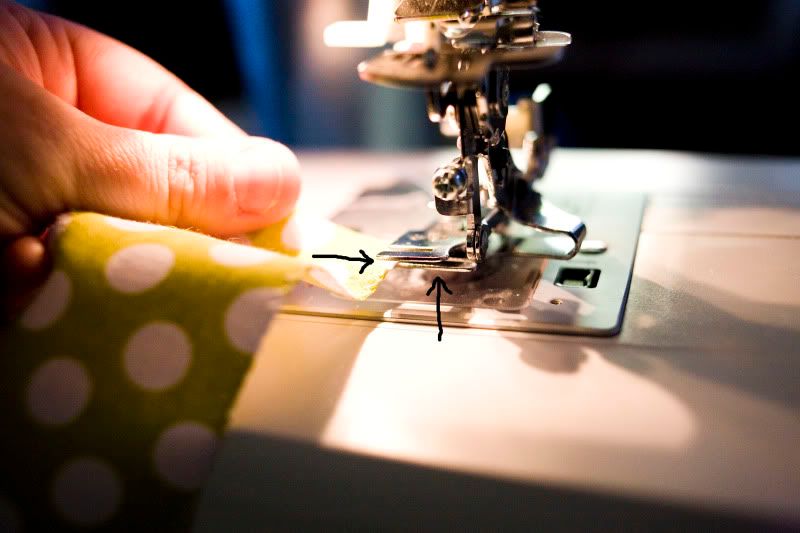
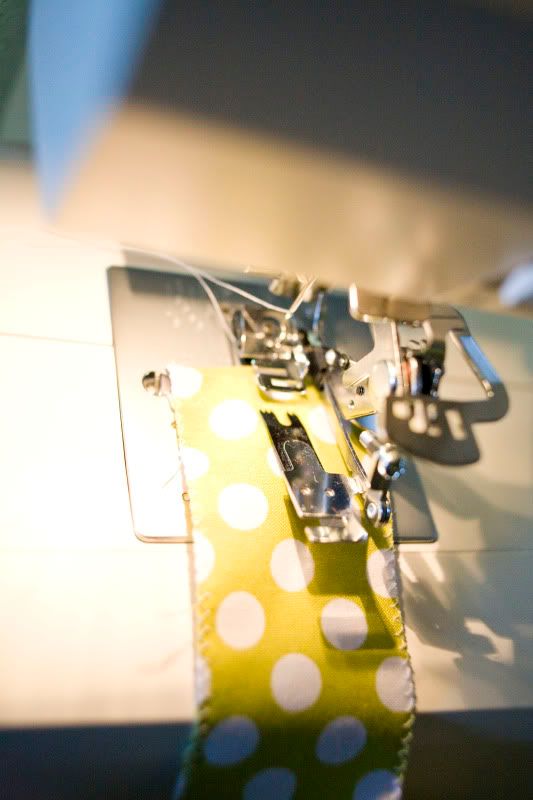
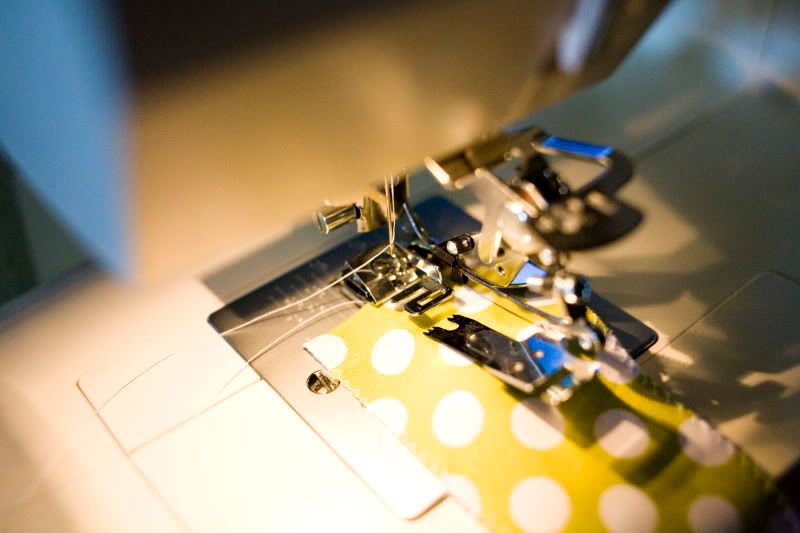
Ok. So as pictured above. Slide the fabric in the slot, and
push it up and under the "claw". I push mine all the way until
the fabric is right under the needle.
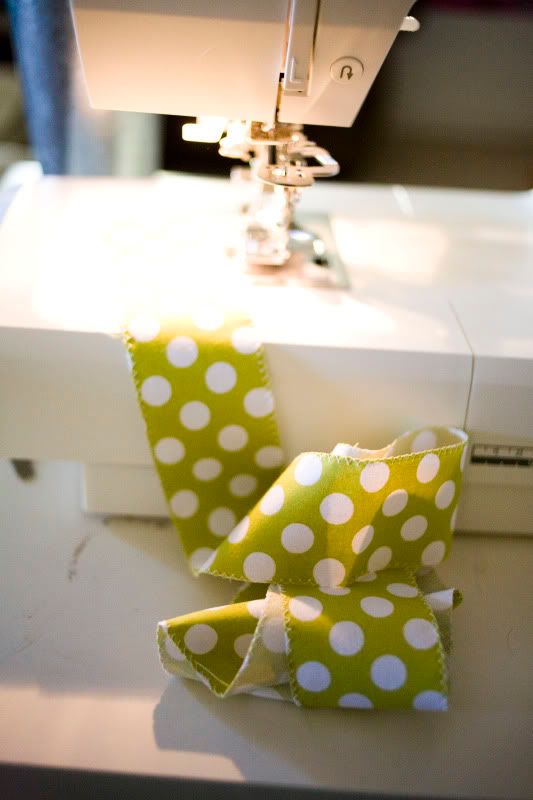
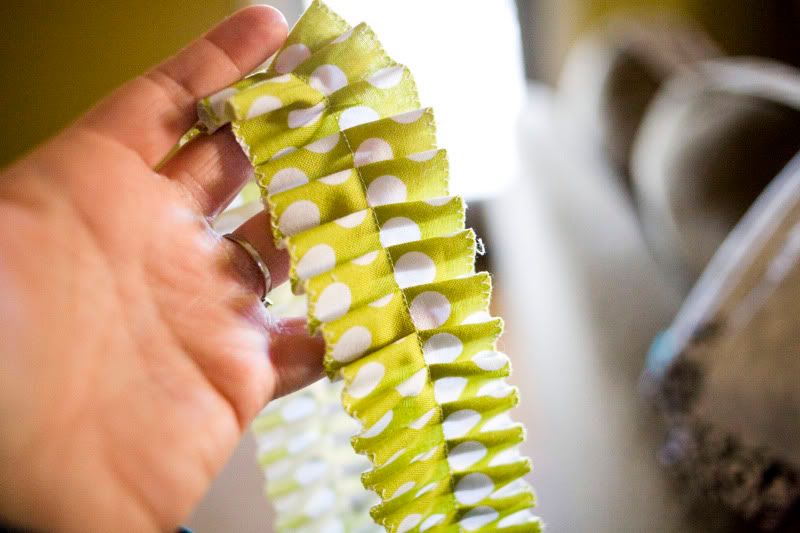
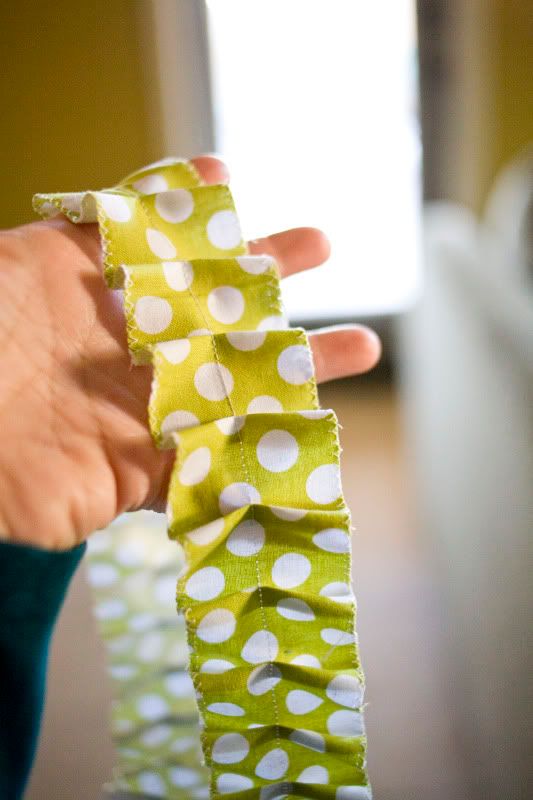
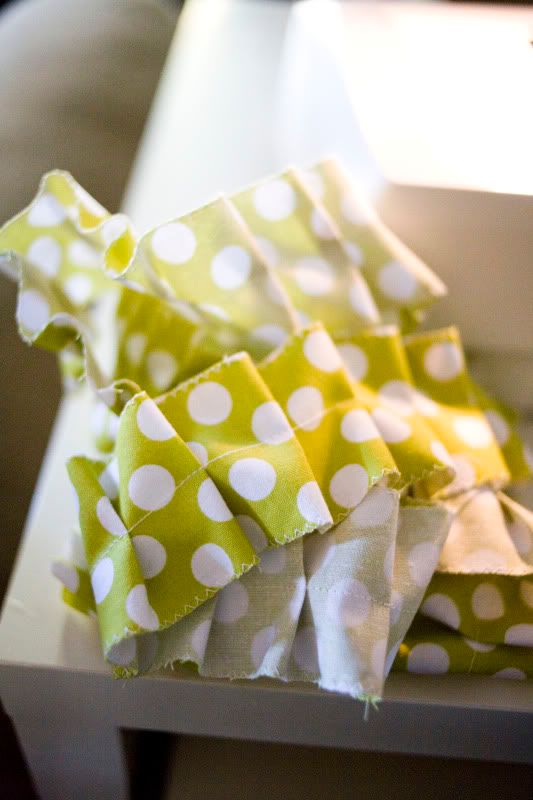
Now... start sewing, and watch the magic happen.
Because I assure you. It's quite magical!
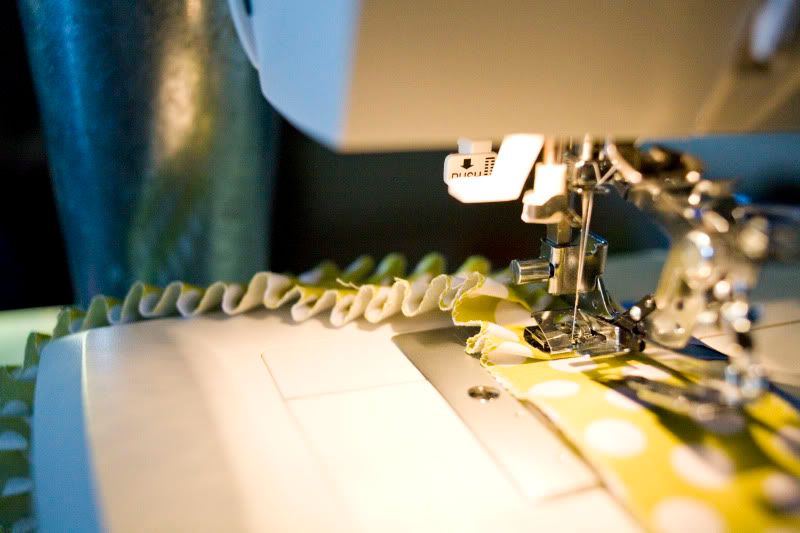
Told you. :)
A couple things I recommend...
Make sure your bobbin is FULL before
putting the ruffler foot on. Just trust me.
Make sure your bobbin is loaded correctly.
Or your machine will throw up
bobbin thread at you. Trust me on this one too.
Make sure your needle lines up above the
opening in the foot, or your
needle with jam and wrap around your fabric.
Resulting is a broken needle and frustration.
Again, trust me once more!
How much are ruffler feet?
For the Singer they're anywhere from $15-$30
For Viking they're $80
Not sure about other machines.
Mine was $80. And worth every. single. penny.
Come back and tell me if you tried
using a ruffler foot!
Better yet... share pictures of your projects!! :)
Happy Sewing!


25 comments:
First of all, Shea - you did a FABULOUS job with this!!!
Don't have a ruffler-foot, but I sure do need one!! So many possibilities! wow.
And, I didn't know it had the "0" setting - so you could basically just keep it on at all times?
neat. neat. neat.
now, I have the urge to run to the store and buy one! {scrap that...it's nearly 9pm and I don't feel like driving in the dark. - oh, that's something I hate: driving in darkness} ;)
I love it...you explained it in a way that I could really understand. The ruffle foot always looks so scary to me, but now I think I can do it! :)
I'm retweeting for you now!
~kim
Whoa! I am totally getting myself one of those this weekend! I want to ruffle every piece of fabric I own! (A little bummed that the Viking ones are the most expensive though, go figure!)
Dude I NEED a ruffler now! Feet for my Janome seem to be pretty in-expensive so I'll have to look into it. Woohooo! Great tutorial!
Ooh I need one of these! How cool! **off to price a ruffler foot now**
Wow! Amazing!
Dang it. Now I need one of those! I will be ruffling everything in sight!
{be prepared for some calls!}
OK, so I'm on a fabric diet... not a sewing diet... so I think I can still get one, right?
Looks awesome! And lovely tutorial, as always!
Thanks Shealynn,
I have a ruffler foot, but I've never had the courage to give it a try. It looked super complicated and I haven't ever really "needed" it you know? Now I'll be ready, and probably needing to make a ruffle to put on something soon!
I love my ruffler foot. This is a great tutorial for all those who haven't used one before.
AWESOME!!!!! fantastic I wish I would have seen this when I bought my generic foot with no instructions lol it took me a year to figure it out. GREAT instructions. ..btw I bought mine from Hancock fabrics for my brother machine and it was 30 no instructions but now we have your instructions YAAAAAAAY!
Ooooooooh! Fun! I need one badly!
Thank you for this post! I've been dying to learn how to do ruffles. I just went and bought the foot for my brother machine. Only $25!!! I'm having a blast!
Thank you!!!!!!!!!!
Helllllo Ruffles :)
...and then...It really did make the sweetest little ruffles. Or pleats. Or something. But it was awesome. Just like you said. I recently purchase the Husqvarna Diamond and have been having way too much fun with the various feet. It was fairly easy to attach the ruffler foot. But even with the directions I couldn’t make heads nor tails about how to place the fabric. Until I came across this little gem you posted with the pictures and delightful comments. Truly, thanks. I am now going to make indefinite ruffles.
Oh thank you! I've owned a ruffler foot for years, but after one disastrous attempt, haven't tried using it again. Will definitely try now!
Thanks so much for sharring this... I am definitely gonna get one now... oh to projects... can't wait!!!
I didn't even know there was such a thing! I'm going to buy one right now!!! :D thank you for this tutorial
Thank you so much for the video, it really helped so much. Will be visiting your site regularly.
Selena
Wow, I had no idea such an amazing tool exsisted!!! I've always just been envious at other people's ruffles. Thank you for an amazing tutorial. I'mm all inspired. Cheers Rachel
Thanks so much for the tutorial! You made it so easy to understand - I was clueless before seeing this.
I posted a link on my blog, along with another tutorial: http://ificould-ificould.blogspot.com/2010/04/ruffle-pillow.html
Thanks!!
AMAZING!!!! so thats how people do it! LOL!!! now i need one! not that i know how to use the machine! all i can so i sew in a straight line! =)
I just bought my ruffler foot and was so pleased to see your tutorial. Thank you so much for a wonderfully detailed tutorial. I am hanging to have a go now.
I love my ruffler foot ($99 for the Bernina) and have been having a fun time mostly using it to make clothes for my daughter. My biggest problem is figuring the setting for various projects and wish when people make projects using the foot they could list the setting they used, saving miles of fabric!
Post a Comment